I have to admit, I'm way behind on the times. It is already October and the My Creative Scrapbook reveal is just 3 days away. I'm still talking about the September Creative kit. I wanted to give you a little tutorial on how I created some of my September layouts. You can view my tutorial as well as many others on the My Creative Scrapbook blog, www.mycreativescrapbook.blogspot.com.
Here is my tutorial:
If you are like me you flip though the pages of your scrapbook and see lots of rectangles and squares; even plenty of circles. September’s Creative kit inspired me to work with a different shape – a triangle. I’ve done a little with triangles in the past but typically I shy away from them because it is hard to get them in a uniform shape or to have the pattern of the paper look good with the shape. This month we have a great paper in our kits with a triangle pattern. I knew this was the month to do something different – to use a different shape on my layouts; triangles!
On my “Love This” layout I made some large triangles simply by following the pattern of the triangle paper. Once I decided on how wide and how tall I wanted my triangles to be I just cut them out followed the lines of the triangles on the paper. Once I cut my triangle paper I used it one triangle as a template to make my cork looking (packaging for my die cuts) triangles.

Here is how the layout turned out.

My second layout using triangles really challenged me but you should not be scared off by it! Once I figured out what I was doing I couldn’t believe it took me so long to figure out. This is not difficult nor does it take as much time as you might think.


First, I chose three papers to work with and cut a bunch of 1 ½” squares. I cut my squares diagnally in half. Next, I decided where I wanted the triangles to go on my layout and used a pencil to draw a line on my cardstock for the top row of triangles. I drew a second line about half an inch below the first line as well. Now I was ready to add my tringles. I put the triangles on my layout before I added the yellow strip on the right as well as the pictures. This way my triangles didn’t have to be perfectly placed on one side or the top row.
I started on the right side of the bottom line and placed my triangle with the point down and the part I cut (where I cut the square in half) on the line. Do the same thing with the next triangle but overlap the first triangle about half way. Place the third triangle overlapping the second one half way as well. Repeat this across the page and once you get to the end of your line, trim your last triangle as needed. I started the next row of triangles between the two pencil lines and a little further to the right of the first triangle (in order to offset the points of the triangles). Repeat as you did with the first row. The third row of triangles should be placed on the to top line again offsetting the triangle points as you did on the other rows. Once you add your yellow strip and photo any imperfections and offsets on the right will be covered up. Just finish assembling your page.


Lastly, I wanted to share how I created the carnation looking flowers on my “I love you” layout. I have to admit I was scared of ruining my flowers when I started working with them but as I did, I got more and more excited about how they were turning out.


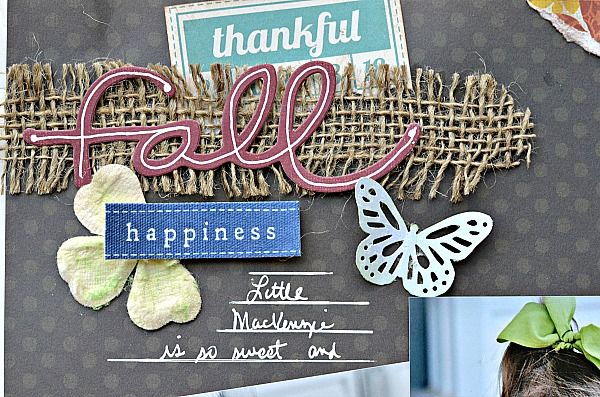


First, I poured a little pink colored glimmer mist on my craft mat and lightly dipped my paint brush in it then touched the tips of the petals. Once I added the mist to the flowers I set them aside to dry (or you can use a heat gun).


Once my flowers were dry I added glimmer glam to the entire flower petals. I find it best not to mix up the glimmer glam. Just dip a fanned paint brush into the bottom of the glimmer glam jar to gather the glitter. The mist may bleed a little so if you feel you picked up much mist on your brush you might rinse it before you apply more glimmer glam so you don’t spread the mist on other parts of the petals. Again, let the flowers dry or use a heat gun to dry them before you add them to the layout.

So there you have it. A couple easy tips that you'll hopefully find helpful when you scrapbook.
NOW FOR THE OCTOBER MY CREATIVE SCRAPBOOK SNEAK PEAKS!
Main kit:

The Creative kit:
Check out the beautiful sneaks of the Limited Edition kit:

Lastly, this month I was asked to work with the Album kit. No..... I didn't make an album. As much as I love mini albums I'm more of a layout kind of girl - besides Kristin Greenwood, our album maker, is so awesome I could never measure up.
Here are a few sneaks from Kristin's mini and my layouts:
You'll find even more sneaks at www.mycreativescrapbook.blogspot.com. Don't forget to check back on the 5th for the full reveal. You can see all my layouts as well as the rest of the team by visiting the design team gallery at www.mycreativescrapbook.com starting on the 5th.
Also, check out the blog - we are announcing a way for you to win the Limited Edition kit for free. You won't want to miss out on that!
I hope you'll be back to visit me in just a few days.
Joan
No comments:
Post a Comment