Monday, December 16, 2013

Paper Tearing Technique

December's Creative kit from My Creative Scrapbook is full of beautiful winter papers from Crate Paper. I had so much fun working with the papers and the pieces - there are so many pieces - in this kit. This month I wanted to share a technique I used on several of my layouts. I hope you like it! If you've never torn paper for a layout you are missing out - especially when you are creating winter layouts. It adds a fun look and it is super easy to do. Amazingly, I've talked to several people who are unsure of how to do it and make it look good. First, let me say it is TORN paper so it really can't be wrong - right? I personally tear paper in short sections. Depending on the look I want to achieve I either tear the paper towards me or away. Check out the differences:
Here I tore the paper away from me. The paper still looks the same along the tear line. Here I tore the paper towards me. Can you see the difference? The paper is white along the tear line.
This is the method I chose to use on my December Creative kit layouts. I think the white part gives a kind of snow capped looked. For my Winter Wishes layout I tore my paper into 3 pieces (per page). I added diamond stickles to the torn parts for an added sparkle. Once the stickles was dry I added the pieces to my layout.
On my Winter Snuggles layout I started out watering down my paper strips using a small spray bottle. Once the paper was pretty wet I tore the paper towards me in small sections as well. This time I also tore little sections further open as well. I finished by curling the torn paper up. At this point I let my paper dry over night. You could also use a heat gun to dry the paper. It will be stiff once it is dry. I added ink to the papers when they were dry and then created my layout.
I also tore the pattern paper on the dashing through the snow layout. For this particular layout I used a pencil and ruler to draw a line from corner to corner of the 12x12 paper. I used the line as a guide as I tore across the paper. I didn't want it to follow the line perfectly but I did want to make sure I was on track to make it to the other corner when I finished tearing. After I tore the paper I placed it on the cardstock. I placed adhesive along the torn edge and then slide in the "snowball" looking ribbon along the edge. I hope you like it!

Saturday, December 7, 2013

A little gift for a a scrappy lover a little gift for you!

Here is a special message from MCS owner, Pam Rangel: Hi girls, Happy Holidays from My Creative Scrapbook. We are so excited to bring you these Fantastic New kits. We know how long your holiday shopping list can be so we have two items just for you. 1.) Give a kit as a gift and receive a gift for yourself promotion, see blog for details or e-mail us . 2.) FREE Gift for you in your January kit shipment. You have worked hard this holiday season and you deserve a gift just for you. So we are sending you a Holiday gift in your January box. How Fun! Thank you for your continued support of our kit club, we are so lucky to have such wonderful customers. We love putting these kits together for you. Happy holidays to you and your family Hugs Pam Rangel Owner www.MyCreativeScrapbook.com

Thursday, December 5, 2013

December My Creative Scrapbook Kit Reveal

Hi Everyone, It's December 5th and that means it's time to reveal the My Creative Scrapbook kits for the month of December. This month the kits are full of Christmas Cheer. It is my favorite month for kits every year. I'd design with everyone one of them if I had the time! Here is the December Main kit - a mixture of Simple Stories and Echo Park.
The Limited Edition kit this month features Pink Paislee Snow Village. The Gold pieces really jazz up this kit but it is still something that even I would love to use with my three sons.
As always, my good friend, Kristin, makes me drool over the album kit. I love the album but I promise you - you have to check out the layout she made with the kit. It is my favorite layout this month! The album kit features Echo Park. Check it out!
I thought I'd also share the "Spot light on your life" project life kit this month. I love it too!
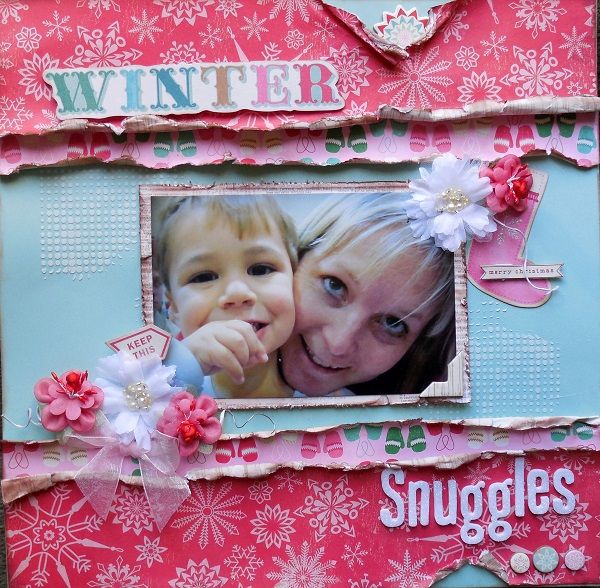
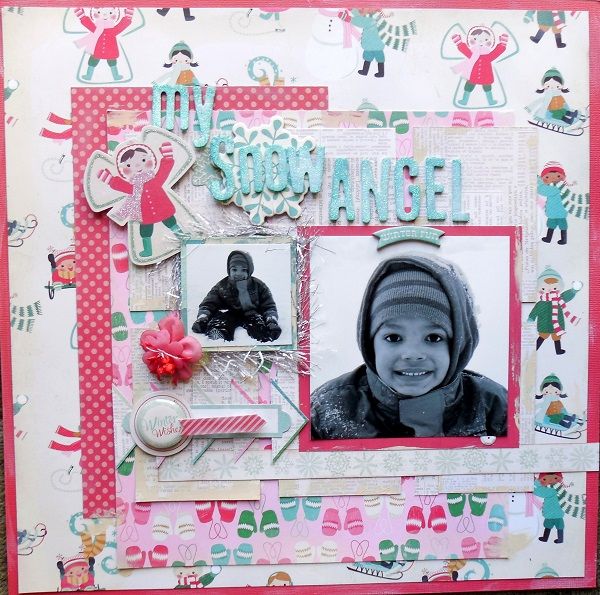
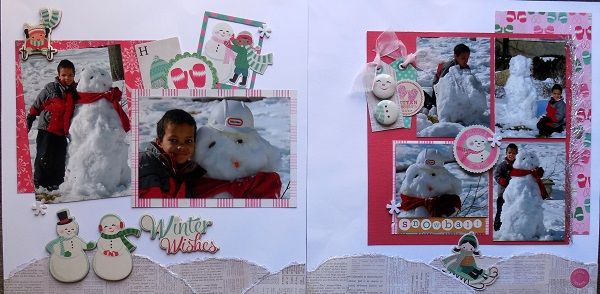
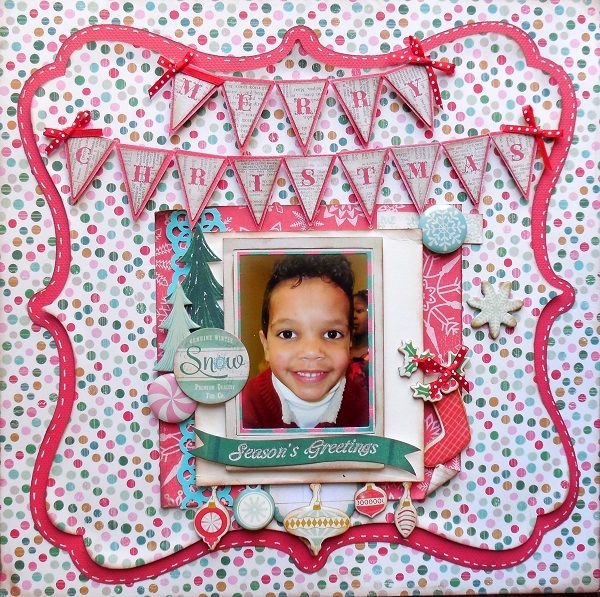
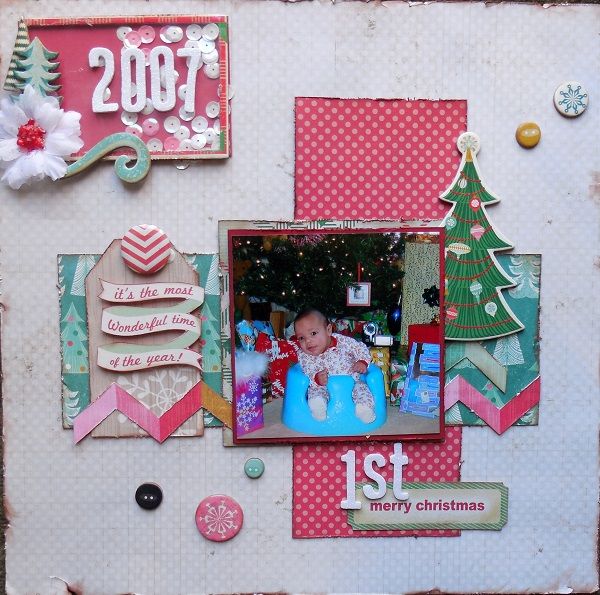
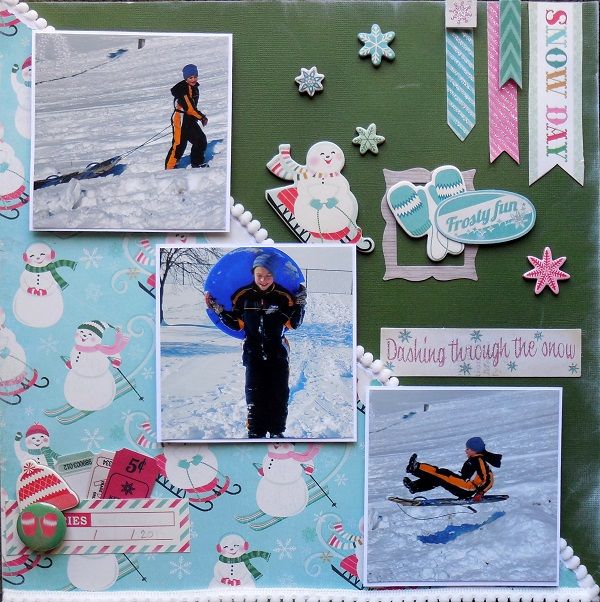
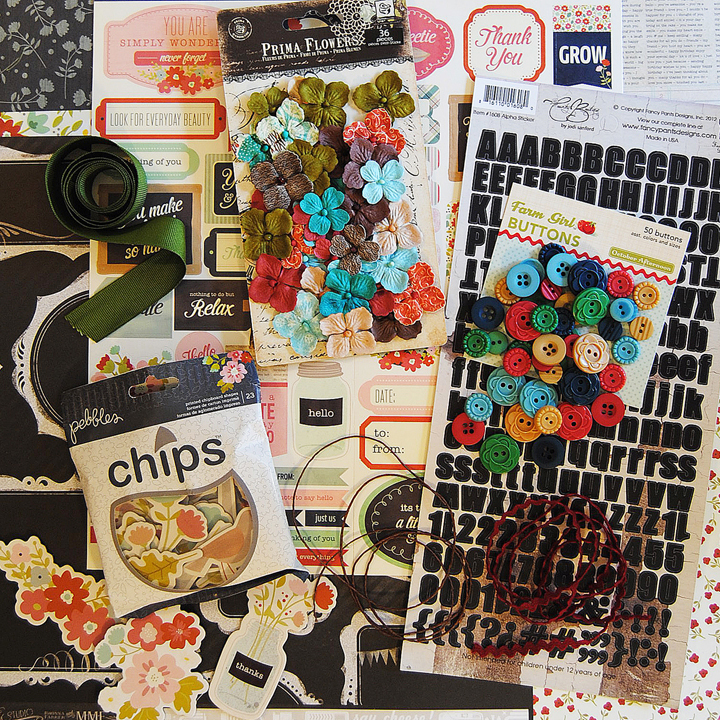
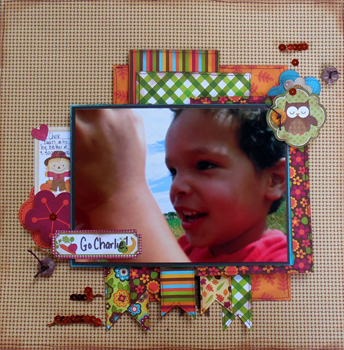
As always, I save my favorite for last! The Creative kit this month features Crate Paper. I LOVED this kit. It was hard to choose what photos I was going to work with because I had so many great photos that coordinated with the papers. In the end, I used up almost every last scrap of paper and have few embellishments left - maybe enough for a card or two. Check out this kit!
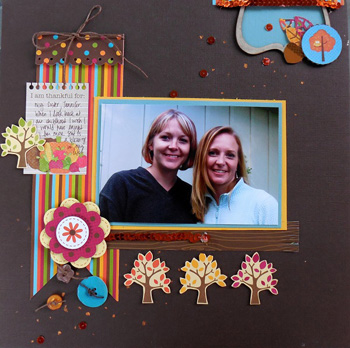
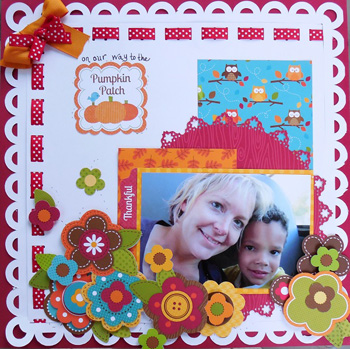
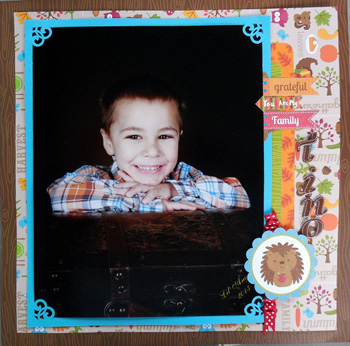
Now for my layouts - there are several:  photo BronsonDec13CreativeLO5_zpsda147abe.jpg  photo 033_zps35f8b21e.jpg  photo BronsonDec13CreativeLO7_zpse9c3c450.jpg  photo twopager_zps06b55298.jpg  photo BronsonDec13CreativeLO4_zps26984882.jpg  photo BronsonDec13CreativeLO3_zps6aba0af7.jpg  photo BronsonDec13CreativeLO6_zps69afdbfb.jpg There are so many amazing layouts to view so be sure to visit the design team gallery at www.mycreativescrapbook.com. Lastly, be sure to check out the subscription special going on for Christmas while you are at the site. You will love it. Merry Christmas, Joan

Monday, November 18, 2013

Making Chalk looking letters using your November My Creative Scrapbook Creative Kit

I absolutely love the November Creative kit from My Creative Scrapbook.  The kit includes some chalk board style frames that I wanted to use.  For my First Communion layout I wanted to use a frame for my title but my letters were black.  I was temped to grab some spare white letters in my stash (you probably are too).  Although the white letters would work I stuck with my kit and decided to use the letters I had.  In the end I am so happy I did - I couldn't be more please with the look I achieved.

I gathered the letters from the kit, Gesso, a paint brush, and the packaging from the stickers in the kit.  I stuck the letters I was going to use on the packaging and dabbed the Gesso on them until I felt they were well covered.  By dabbing the paint on I could still see some black showing through.


Once the letters were dry I removed from from the packaging and added them to my layout - so cool!


Looking back, my tip would be to use a crafting mat rather than the packaging like I did.  The letters stuck to the plastic more than I had anticipated and they were hard to remove.  I peeled most of the sticky backing off of them and tore one letter in the process.  I had to add adhesive to the letters to use them.  Luckily, I didn't have to redo all the letters!  I'm so thrilled I stuck with my kit and didn't reach for my white letters - my finished product turned out so much cooler and it really wasn't that much more work.  I hope you'll give it a try sometime too.

Monday, November 4, 2013

November My Creative Scrapbook Reveal is Up!

The November www.mycreativescrapbook.com reveal is up and ready for you to copy :). Remember the beauty of receiving a MCS kit is that not only do you received all the materials to make great layouts, you are also welcome to copy our work! You can make your layouts just like we did or use them as a starting point to create your own interpretation. Of course, you can always create your own fabulous works of art too.

Here is the November Main kit featuring Echo Park. Pam mixed two Echo Park lines to create this beautiful fall kit.


The Limited Edition is beautiful isn't it?  It is filled with Webster's Paris II products. 


My good friend, Kristin, designed two albums with the Album kit.  Look for a tutorial at www.mycreativescrapbook.blogspot.com later this month to check out how she made the second album.  You will want to try this out!  The album kit is full of Teresa Collins papers and embellishments.  I love all the blue!

 
Lastly, I'm back to designing with the Creative kit this month. I have to admit, I was thinking I'd be working with something more fall like.  I was a little disappointed until - I looked at the beautiful papers!   I love them.  Some of the photos are fall photos but really I used pictures from all different times of the year.  November is the month for giving thanks and family.  This paper worked great for those kinds of photos.  I hope you enjoying working with the Pebbles Front Porch papers and embellishments as much as I did.   


I made this two page layout of my son's first communion this spring.  I'll have a tutorial for you later this month on how I created the "chalkboard" letters.  It is super easy.


Sunday, November 3, 2013

My Creative Scrapbook November Sneak Peaks

If you haven't visited the My Creative Scrapbook blog this month, the sneak peaks of the November kits are up. A few sneaks of the Creative kit are pictured below. Please forgive my extra extra LARGE pictures. I'm still new to the blogging world. I wanted to get some sneaks up for you to see. Hopefully, I'll figure out what I'm not doing right this post because I want to show you all the great layouts and kit contents in a few days. Plus, this month I'm going to share some of my personal projects with you too. Check back on the 5th for the full My Creative Scrapbook reveal.  photo MCSJoanNovCreativeSenak4_zpsa8664731.jpg  photo MCSJoanNovCreativeSneak3_zps190505cf.jpg  photo MCSJoanNovCreativeSneak2_zpscae63406.jpg  photo MCSjoanNovCreativesneak1_zpsa341f97b.jpg Have a great week! Joan

Monday, October 21, 2013

Tips and Tricks for the October My Creative Scrapbook Album kit

This month I have a few quick tips for you to try with your layouts.

Turning an ordinary circle into a decorative die cut circle
Don’t have a die cutting machine but want the look of a decorative die cut?  If you have a corner punch you can achieve the same look.   First, cut out a circle in your desired size then use the corner punch to create a decorative punch, rotate the circle and punch again.  Continue punching until you’ve went around the circle.   You might like making each punch close together like I did or space it further apart for different look.

Check out the red decorative circle in my layout.


Altering decorated chipboard and more
I was so excited to try something new when I purchased my Viva Decor Inka Gold in orange about a year ago but once I got home with it I got scared off.  Now I can’t believe what I’ve been missing out on.  I finally gave it a try when I decided that as much as I loved the chipboard letters included in the kit needed more color on my layout.  The Inka Gold is a thick paste like substance with a beautiful shimmer.  To alter the letters I started by sanding them.  Once I sanded my letters, I used my fingers to paint them with the Inka Gold.  Since it is so thick it really covers the letters.  It also dries very quickly.  Once I finished the Inka Gold washed off my hands completely.  It was so easy.


Now that I used it once, I had to try it out in some other ways.  I used my fingers again to rub the tips of my burlap pedals in the same layout.
 

Lastly, I used the end of a paint brush (not the brush) to add speckles of orange to the Thankful layout.  Even on dark colored paper the Viva Decor Inka-Gold really shimmers.
Now I’m addicted!  I adding Viva Decor Inka-Gold in all colors to my wish list . 
 
Scrap your professional photos!
Do you include your professional photos in your scrapbook?  Once you replace them with an updated photo what do you do with them?  When my oldest was born I went overboard with the professional pictures.  Every month I had his photo taken at some photography store.  I loved them but quickly ran out of space for all of them.  Even though I wanted to include them in his scrapbook I was concerned about adhering them to the page.  What if I needed that photo again someday?  I hated the thought of tearing up a scrapbook page or worse -ruining the photo.  If you are like me and want to include your professional photos in your scrapbook but still be able to remove the photos I recommend using photo corner (I typically use clear photo corners) or for a fancier look, use a photo corner punch like I did in the Tino layout. The great thing about using an 8x10 photo on a layout is that it doesn’t take much to create the layout.  Just add a photo, a few embellishments, and your layout is finished. 
 
I hope you'll try out some of these techniques on your layouts too.  If you ever have any questions for me on how I did something in the gallery feel free to leave me a message on my blog www.scrappyjoan.blogspot.com and I'll be happy to respond.
 
Joan


Saturday, October 5, 2013

October My Creative Scrapbook Kit Reveal and a Chance to Win

Happy October!
Can you believe fall is here?  I wouldn't believe it before today.  The last few days its been hot here in Missouri.  Today, a cold front came in.  Yesterday's high was 88.  Today's high is 58. 
I am so excited about the October kit reveal.  I was lucky enough to work with the Album kit at www.mycreativescrapbook.com.  It features Doodle Bug's Happy Harvest line. 
First, let me introduce all the kits this month....

The Main Kit features Bo Bunny's The Avenues


The Creative kit features Little Yellow Bicycle's Feels Like Home.


The Beautiful Limited Edition kit is filled with Prima's Anna Marie line.


Last but not least here is a photo of the Album kit.


My good friend, Kristin Greenwood made the album this month.  You are going to love it.  Check it out at www.mycreativescrapbook.com or visit her blog, http://kmgreenwood.blogspot.com/.

I  made a ton of layouts, check them out.


My Creative Scrapbook is hosting a blog hop this month. Unfortunately, I was not able to participate this month but you can!  Visit the blog for all the details on how it works and the prizes you win.  I'm hopping - I hope you will too.  www.mycreativescrapbook.blogspot.com.

Lastly, leave me a comment and let me know what your favorite layout is this month.  I'd love to know!

Joan